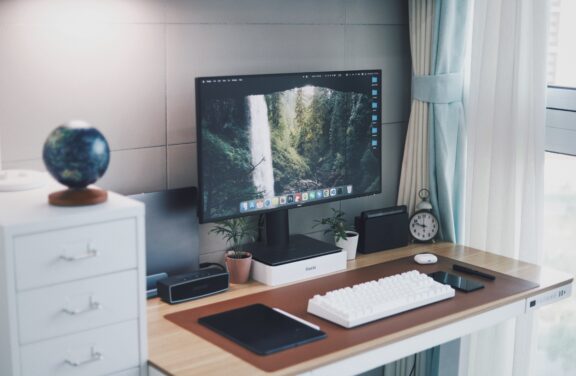
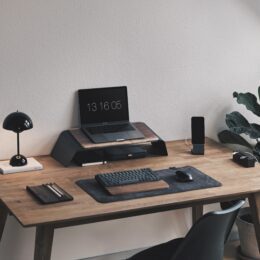
Most work from home desk setup guides read like an Amazon wishlist someone threw together in an afternoon. Everything makes the cut. Nothing gets questioned. This isn’t that.
I’ve spent years refining my own setup. Buying things that disappointed, returning things that looked better in photos, and gradually finding on a desk that I actually want to sit at every morning. This guide covers what genuinely makes a difference, what’s overhyped, and a few things that are worth every penny.
One rule I stick to… if it doesn’t look good and work well, it doesn’t belong on the desk!
The Monitor
This is where most people either overspend on specs they don’t need or underspend on something that strains their eyes by 3pm.
For most remote workers, a 27-inch monitor at 1440p (QHD) is the sweet spot. Large enough to be useful, sharp enough that text is crisp, not so large that you’re turning your head all day. 4K is nice but you’ll pay a premium and unless you’re editing photos or video, the difference in daily use is marginal.
What actually matters: panel type and colour accuracy. An IPS panel gives you better colour and wider viewing angles than TN. If you’re doing any creative work alongside your regular tasks, this matters more than raw resolution.
Worth looking at: the LG 27UN850-W — clean design, USB-C connectivity, good colour accuracy. Ugly cables are a desk aesthetic killer so anything with USB-C hub functionality earns its place immediately.
Skip: ultra-wide monitors unless you genuinely multitask heavily. Most people find them tiring and they dominate a desk in a way that rarely looks good.
The Monitor Arm
Non-negotiable once you’ve used one. Your monitor should not be sitting flat on a stand eating desk space and directing your sight downward.
A good monitor arm frees up the entire footprint of your monitor stand, lets you position the screen at exact eye level, and makes the whole setup look intentional. It’s one of those upgrades that seems minor until you’ve done it.
The Ergotron LX is the one most people in this space end up on. Smooth adjustment, holds position well, doesn’t sag over time. It’s been the benchmark for years for a reason. There are multiple options depending on whether you have one or multiple screens.
The Keyboard
Keyboards are a personal preference. But for a clean, aesthetic desk (especially if you’re going for a minimal look) there a few great options.
MX Keys S — the full-size version. Number pad included, backlit keys, excellent typing feel for a low-profile keyboard. Good if you do a lot of data work or just prefer the full layout.
MX Keys Mini — the compact version. Loses the number pad, gains desk space and a cleaner look. The better choice for a minimal setup. Still backlit, still the same quality key feel.
Both connect via Bluetooth or the Logitech Bolt USB receiver, and both support multi-device pairing — so you can switch between your laptop and desktop without unplugging anything.
Skip: any keyboard bundled with a desktop PC. They’re universally bad and they’ll drag the look of your whole setup down.
The Mouse
If you’re going with an MX Keys keyboard, the natural pairing is the Logitech MX Master 4 – one of the best all-round productivity mouses available at the time of writing this blog post. Comfortable for long sessions, the MagSpeed scroll wheel is one of the best pieces of peripheral engineering on any desk accessory, and the customisable side buttons earn their keep once you’ve set them up for your workflow. It’s also noticeably quieter than its predecessor and the clicks are dampened without feeling mushy.
If you’re not going the MX Keys route, it still pairs wirelessly with any setup and the Bluetooth connection is solid.
The Desk Mat
Underrated. A good desk mat pulls a setup together visually more than almost anything else. It’s essentially the foundation everything sits on.
Go leather or leather-look for a clean, minimal aesthetic. Avoid anything with branding or logos printed on it. The Orbitkey Desk Mat is excellent. Structured edges, built-in cable management, and comes in neutral tones that pair nicely with most setups.
For a more affordable choice, there are plenty of large extended mouse pads in neutral colours (black, grey, beige) on Amazon or eBay that look great as well and do the job.
Skip: small mousepads. They look unfinished and your mouse runs off the edge constantly.
The Lighting
Two things matter here: your key light (what lights your face on calls) and your ambient lighting (what makes the space feel good to be in).
For key lighting, the Elgato Key Light Mini is the cleanest option. Compact, app-controlled, colour temperature adjustment, and it doesn’t look like a YouTube setup prop. If you’re on calls regularly, the difference in how you appear is significant.
For ambient lighting, a simple LED strip behind your monitor (bias lighting) reduces eye strain during long sessions and adds depth to the setup without being garish. These Govee LED strips are a great choice: cheap, app-controlled, with plenty of warm tones to choose from.
If you’re already in the Philips Hue ecosystem, the Hue Play Gradient Lightstrip is a premium alternative — it integrates directly with your existing Hue setup and the colour syncing is noticeably better. You’ll pay for it though, so factor that in against what you already have.
Skip: ring lights. They’re great for video content but on a desk they look out of place and the circular catchlight in your eyes on calls may have you colleagues thinking you’re an influencer.
The Webcam
If you’re on professional video calls every day, your budget laptop camera just doesn’t quite cut it. The soft, low-light, wide-angle image most built-in cameras produce makes you look like you’re calling from a budget hotel room.
The Logitech Brio 300 is the current recommendation at the mid-range: 1080p, decent low-light, USB-C, minimal design. It sits on top of your monitor and largely disappears. If you want to step up, the Elgato Facecam shoots in 1080p60 with more manual control over the image.
The One Thing Most People Skip
A laptop stand — if you’re working with a laptop alongside or instead of a monitor. Putting your laptop at eye level rather than flat on the desk immediately improves posture, clears space, and makes the setup look more composed.
The Twelve South Curve is the aesthetic choice if you’re in the Apple ecosystem. Another aesthetic option is the height adjustable Native Union (I love the colour options here as they are not far off my brand colours).
What to Skip
- Desk organisers with multiple compartments. They fill up with junk immediately and make a desk look busier, not tidier. One small tray if you need it.
- USB hubs that sit on the desk surface. Get one that mounts underneath or stays behind the monitor.
- Anything with RGB lighting unless you’ve made a very deliberate choice about it. In a minimal setup it almost always looks wrong.
- Cheap monitor stands. If your monitor doesn’t have an arm, the stock stand is fine. A cheap aftermarket stand is usually worse than the original and looks it.
The Bottom Line
A good work from home setup isn’t about spending a lot. It’s about spending deliberately. The items that make the biggest difference — monitor position, lighting, a keyboard that doesn’t make you dread typing — are rarely the most expensive things on the list.
Get the fundamentals right first. Then add the details that make the space feel like yours.
All product links on this page are affiliate links. If you buy through them, I earn a small commission at no extra cost to you — it’s how I keep this blog running. I only recommend things I’d genuinely buy myself.
If this helped, the next post worth reading is The Best AI Tools for Complete Beginners in 2026 — what’s actually worth using and what to ignore. Or start with the bigger picture: The Future of Remote Work Has Started.